Is it possible to perform Picnik Download? In a certain sense, Yes, you can. Let’s see how it’s possible to have all features of picnik always ready to use.
 When you surfing the web, have you ever seen a photo or image that you really liked and now you would like quickly edit it by picnik ? Generally, what do you do?
Generally, the first thing you do, is to save image in your Hard Drive, than go to Picnik home page, upload it again, and finally edit the photo. Don’t you think that this is a waste of precious time ? Well surely it is. But there is a shortcut. All you need to do is perform a picnik download, downloading Plugins and Addons for your browser.
Plugins and Addons are a sort of extension that can be installed in your Browser and once installed, a new menu item will appear. This new menu item is the shortcut you need to upload directly images you want to edit by picnik from your browser.
There are different types of Plugins and Addons, everyone is specifically designed for a specific browser. Plugins and Addons are available for the following Browsers:
- Mozzilla Firefox
- Internet Explorer
- Google Chrome.
Let’s look now how to download, install and use these “shortcut”.
Picnik Download: How To Download And Use Firefox Addon
Click on Firefox Picnik Addon, to start download, the following screen will appear
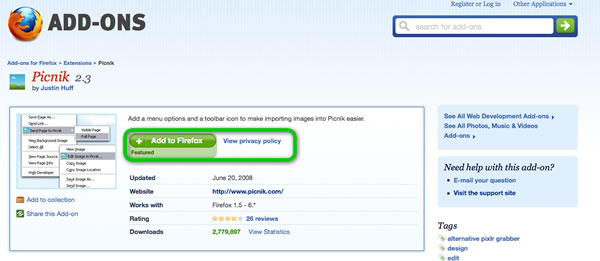 Click on the Green Button to add to Firefox the selected Plugin, The Plugin will be installed and fully functional after restarting the browser.
How To use it? Using this Addons is very easy. Right click on the image you want to be sent to picnik, and select the new Menu Item “Edit Image in picnik”
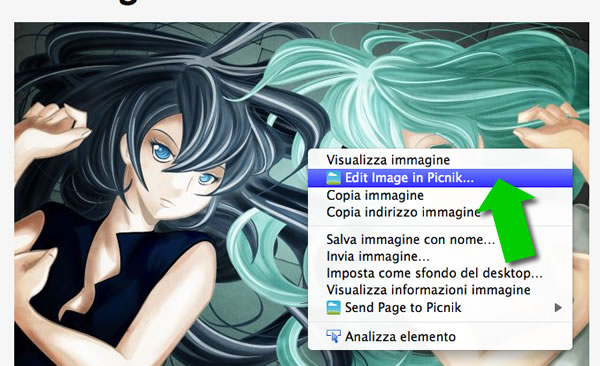 The image you clicked on will be automatically sent to picnik, and will be immediately available for editing, like shown below.
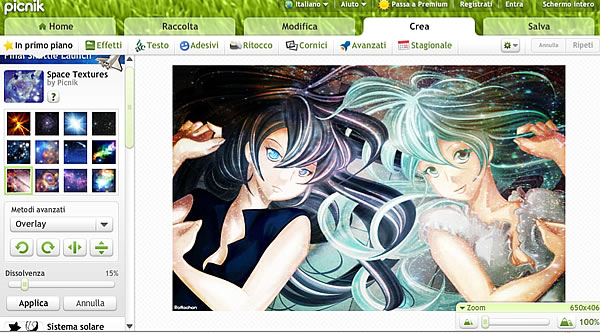 Now just Edit and save your foto as usually, and you’re done!
Picnik Download: How To Download And Use Chrome Addon
To start downloading Picnik Chrome Addon click Chrome Picnik Addon the following window will appear.
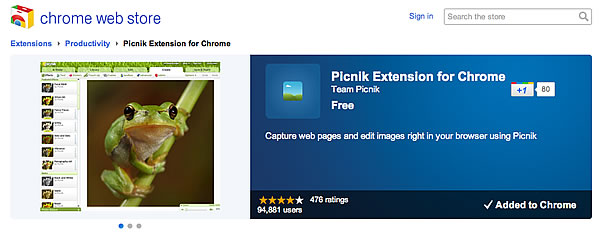 The Picnik Addon for Chrome will be installed in few seconds. Restart your browser to finish installation. Only after the restarting of Chrome the addon will be fully functionally.
How to use it?
If you look at the right top corner of the browser, a new button is appeared. The button has the icon of picnik, to activate it just press it.
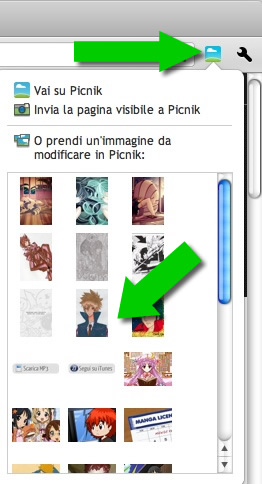 Once pressed, a little scrolling window will appear, it contains all images of the web page you are visiting. Click the Image you want to send to picnik, and you’re done!
Picnik Download: How To Download And Use Explorer Addon
To start downloading Explorer Picnik addon click here. Some confirmation windows will appear. Just click “ok” or “continue” in every windows (You Know, Windows Vista and 7 are paranoid…) to finish installation.
As Firefox addon, Explorer addon also, will install a new menu item on your right click menu.
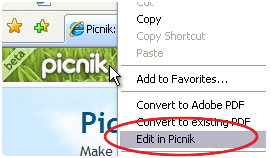 To send an image to edit by picnik, just right click over the image and click “Edit in Picnik”, the image will be immediately sent to Picnik to start editing.
So, enjoy with your “ShortCut” to Picnik, and Remember to share this article with your friends on Facebook, Google+ and Twitter!
Translated from the original Scaricare Picnik

17 Responses to Picnik Download: How To Download Picnik Addons