Picnik is the most famous photo editing website where you can edit photos and images in a really uncommon way, and at the same time, it’s very easy to use! Picnik Effects is the most powerful tool of picnik. Let’s look now how Picnik Effects appears and transforms images once applied to one single Photo.
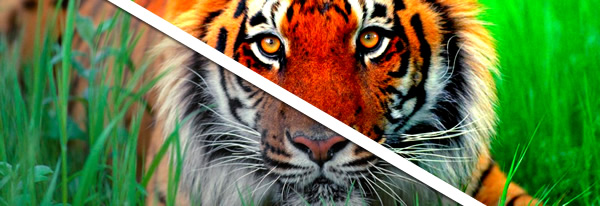
To show you, how picnik effects works, I have choosen a random image from Google and I’ve applied several effects on it. Just look the differences between the original one and the other one to understand how picnik effects works and changes the colors and properties of the Photo.
Picnik Effects: Basics Effects
The basic picnik effects can be found at the top of the working area of picnik. Just push the white buttons to activate them.
The Basic Picnik Effects Are:
- Exposure: Use this filter to correct the Exposure of your Photo or Image, you will be able to correct and Contrast too
- Colors: This filter correct the colors of the photo, saturation and temperature can be corrected very easily using this filter.
- Sharpen: Just choose the sharpness of your photo changing the bar position.
Look at this image to see how the original image is changed by the basic picnik effects.
Look at this image to see how the original image is changed by the basic picnik effects.
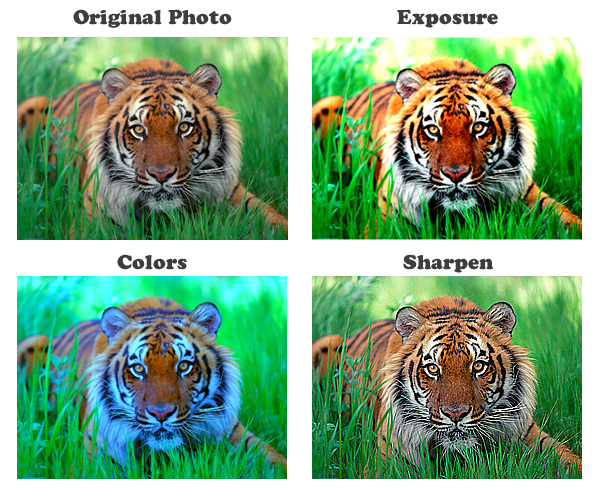 Everyone of these effects has the “Auto†Option, just click the Auto button to correct the photo automatically.
Picnik Effects: Basics Effects In Create Menu
The effects just shown can be found in the main working area of picnik, just after uploading a Photo. There are many Menus on the top on the screen, the following Picnik effects can be found in Create Menu. In this Menu there are several category of effects. Let’s see now the first of this category of effects. Basics picnik effect
The Basics Picnik Effects in Create Menu are:
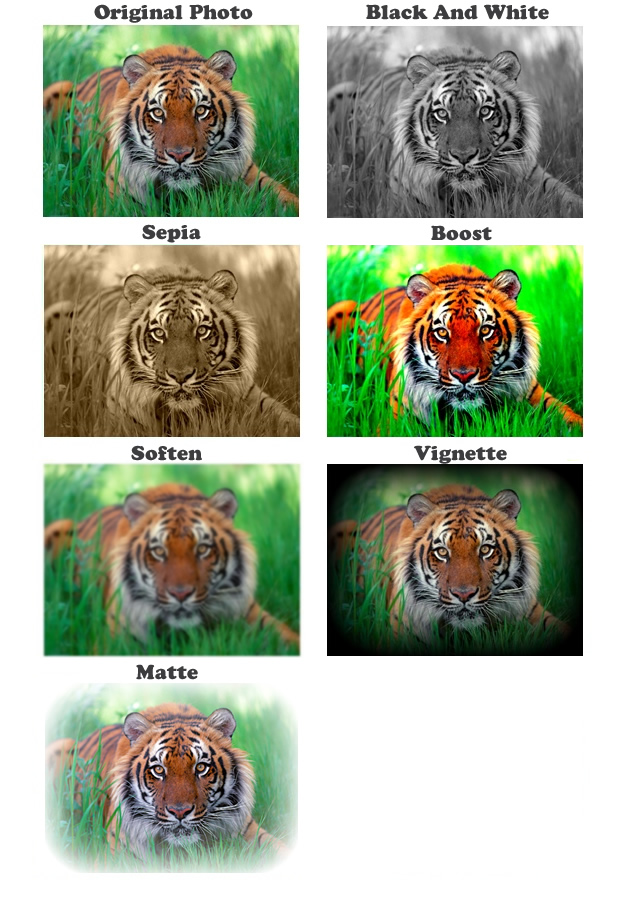
- Black and White: Turn Your Photo in Black and White color or Gray Scale
- Sepia: Transform your photo using the sepia effect to give your photo a vintage look
- Boost: Boost the color of your Photos increasing the contrast
- Soften: Make your photos soft and glowy like a dream.
- Vignette: The vignette effect, darkens the edges of your photo making a cool vignette style. You can Grow o Shrink the rounded border too.
- Matte: this is the opposit effets of vignette. Add a light glow to the edges of the photo. Grow or Shrink the border as you like.
Picnik Effects: Camera Effects In Create Menu
The second category of picnik effects in create menu are Camera Effects. These effects virtually change the type of camera that has taken with. The effects in this category are:
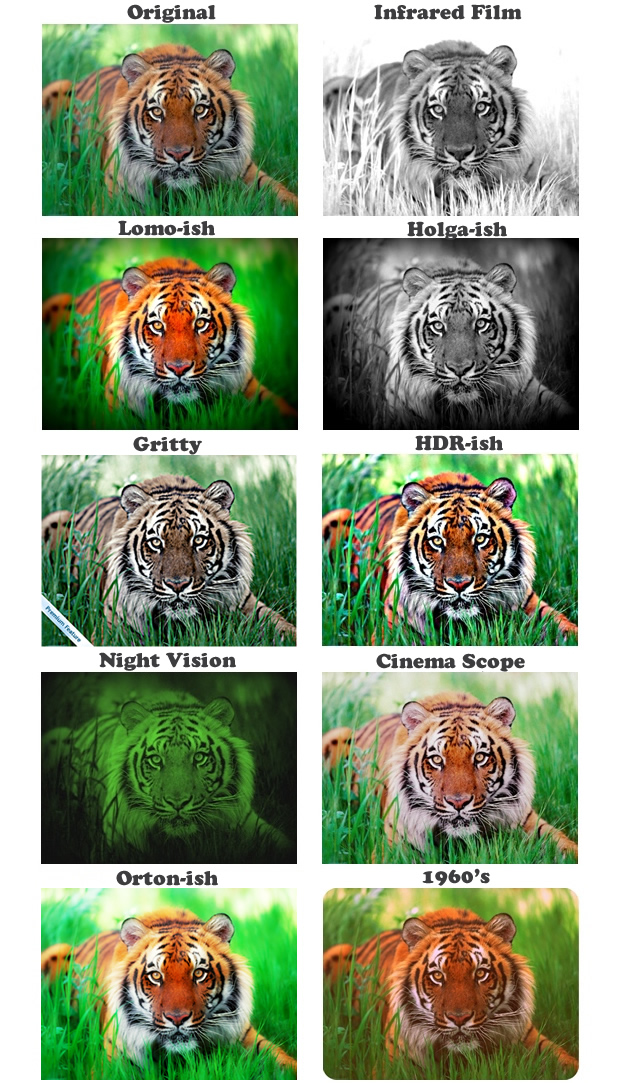
- Infrared Film: This Effect mimics the look of black and white infrared film. The Fade slider blend the colors of the original photo with the new ones.
- Lomo-ish: Do you remember the Lomo Toy Camera? This effect mimics a photo taken with this particulary Camera.
- Holga-ish: The effect, mimic the holga Camera using a combination of cool black and white colors.
- Gritty: Add a grainy effect to your photo.
- HDR-ish: Create a Stunnig HDR (High Dynamic Range) Effect to your Photo.
- Night Vision: Mimics the infrared night vision camera, turning your photos in Green colours.
- Cinema Scope: Add to the photo a bright and slightly grainy effect
- Orton-ish: Mimics the effect of Michael Orton creating pretty and saturated Glowy to your photos.
- 1960′s: This Effect mimic the old 60′s photos style, changing the colors and rounding the edges.
Let’s give a look now to these camera effects.
Picnik Effects: Color Effects In Create Menu
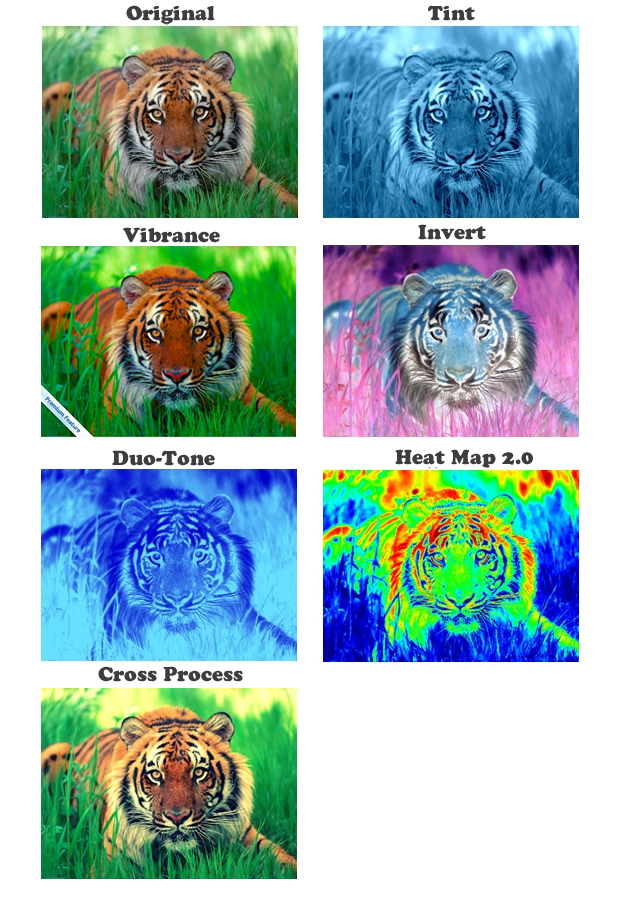
The third category of effects in Menu Create is Color Effects, a group of filters and effects that changes the colors of the photo in uncommon and artistic way.
The Effects you can find in this category are:
- Tint: Choose and tint your photo using all color range of a single color.
- Vibrance: Vibrance effect is useful to increase the saturation perfectly, skin tone, Mid tone and Shadows are nicely blended together.
- Invert: Invert the colors of the photo, creating a negative image of the original one.
- Duo-Tone: This effect transforms the colors of the image using two colors of your choice like a gray scale effect.
- Heat Map 2.0: The effect mimics the colors of a thermal camera
- Cross Process: This effect mimics cross-processing.
Here you can see how the previous effect change the original photo of the tiger.
Picnik Effects: Area Effects In Create Menu
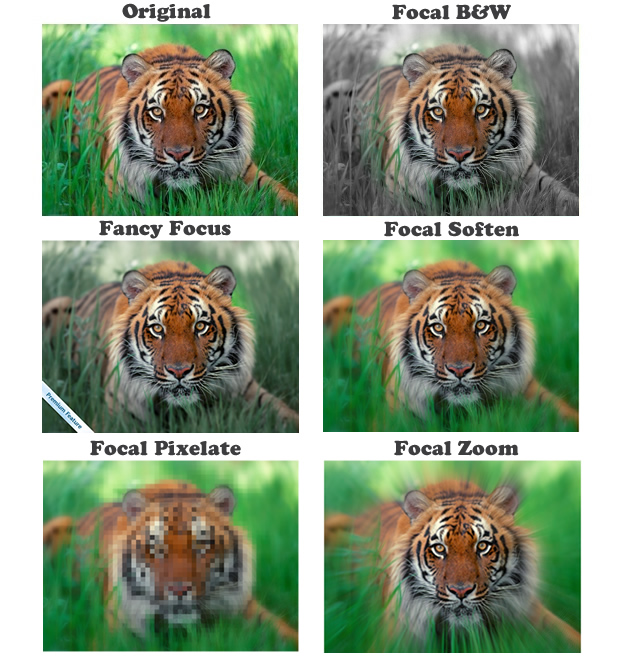
The Fourth category in Create menu is called Area Effects, these particular type of picnik effects are specifically designed to work in a single area of the photo. The effects you can find in this category are:
- Focal B&W: This effect create a circle where the colors are transformed in Gray Scale, you can also reverse the effect having in the circle the original colors and outside the gray scale
- Fancy Focus: This effect is used to highlight the subject of a photo creating a blurred background.
- Focal Soften: The effect empathize a point inside your picture.
- Focal Pixelate: Anonymize someone in the picture using this effect that create a pixellated area in the area where the circle is positioned.
- Focal Zoom: You can use this cool effect to Make your subject fly through your photo.
Here you can see how the effects appear once applied to a picture.
Picnik Effects: Artistic Effects In Create Menu
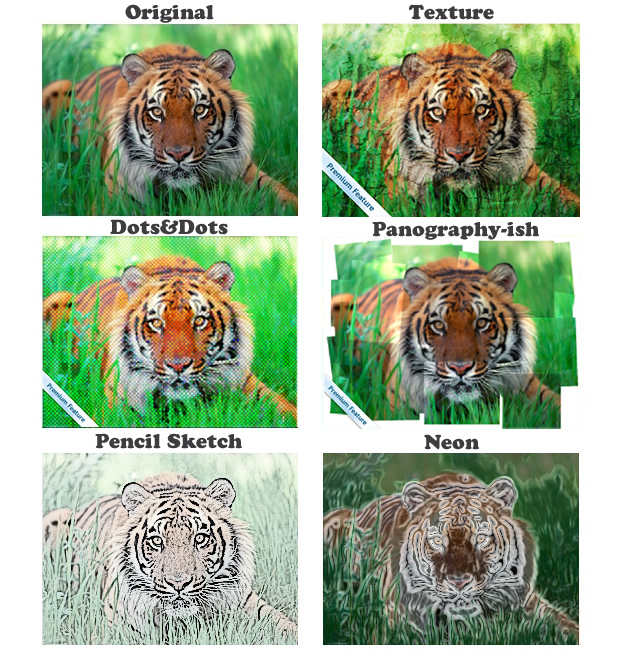
The last catecory that can be found in Menu Create is Artistic Effects. These Filters add an artistic touch to your picture. The effects availables in this category are:
- Texture: This effect adds a texture over the picture. You can choose a lot of different textures in the effect properties.
- Dots & Dots: The effect creates a new dotted images from the original one. There are a lot of different kind of dots you can choose.
- Panography-ish: This effect transforms completely your picture, creating a patchwork of images carefully stitched together.
- Pencil Sketch: Turn you Photo in a Pencil sketch portrait.
- Neon: Give a flourescent look to your photos.
As done before, here you can se all the effects applied to a singular photo.
Picnik effects: Other Effects
In Create Menu there are other options you can choose, like Text, Stickers and Frames. This menas that in addition to the effects we have just seen, you can also insert Text, Stikets and Frames in your Photo. Down here, you can see just an example of that.
 So, I hope this article will be usefull to you, please Share it with your friends on Facebook, Twitter, and Google+ !
Translated from the original Modificare foto – Il fotoritocco su internet

13 Responses to Picnik Effects: Picnik Photo Effects Overview